Photo of Nana's recipe book, recipe cards and photos

Photo of Nana's recipe book, recipe cards and photos

Wednesday 14 August 2019

Mitchell's Lemon Loaf

My seventeen-year-old son Mitchell is fun to bake with because he has great reactions when he tastes something he likes and he looooves this lemon loaf. We’ve tried a few different versions of this in the last few years but have finally settled on this recipe that’s packed with flavour and “better than Starbucks.” Mitchell’s twin sister Taylor and I are partial to desserts with chocolate – much like my Leonard grandfather aka Pop. But I understand that some Leonard family members – and both Mitchell and my husband Mike – tend to prefer fruit-flavoured desserts. Mike even says this is 
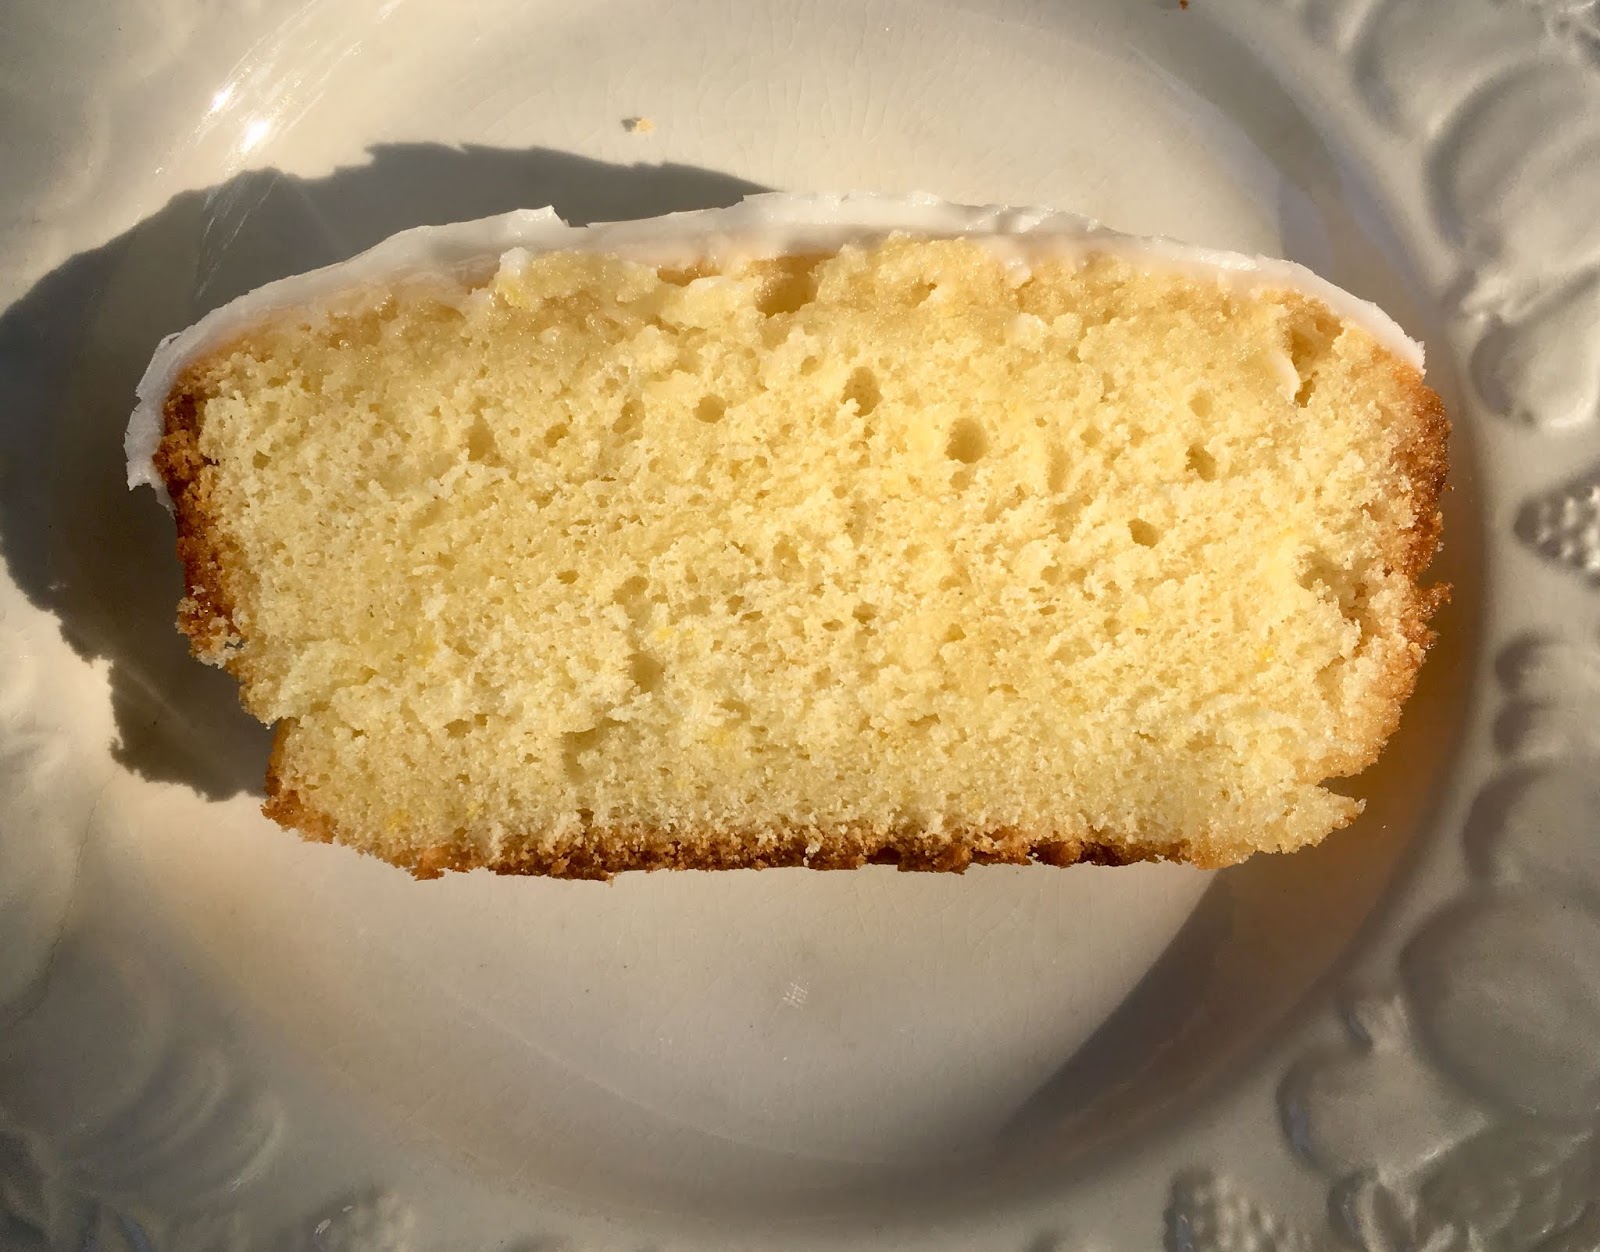
“moister” than Starbucks (if moist-er is even a word). This is a fairly dense cake, like a pound cake, and I find that with all this flavour, just one piece is very satisfying.

So here you go, the recipe.

Lemon Loaf
 
Preheat oven to 350°F

Ingredients

1 ½ cups flour
½ tsp baking powder
¼ tsp baking soda
¼ tsp salt
½ cup butter (unsalted)
1 cup sugar
3 eggs
zest of one lemon (1-2 tbsp)
2 tbsp lemon juice
½ tsp lemon extract
1 tsp vanilla extract
⅓ cup buttermilk

Make sure all ingredients are at room temperature, especially eggs and butter.

old-fashioned glass reamer for citrus fruit

Baking Tip:

Zesting citrus fruit:
Wash and thoroughly dry the outside of the fruit, removing any wax – or anything else.
Zest BEFORE you juice a lemon. When zesting citrus, remove just the thin coloured skin and leave behind the white pith that’s underneath the zest – it’s bitter. To produce zest use the very fine grater of a box grater, a microplane/rasp, or a zester. I found that a handheld zester requires alot of pressure and doesn't yield much. Using two lemons I can get about 2 tbsp lemon zest using my box grater, and all the lemon juice I need for the loaf, the glaze and the icing. I could probably get more zest if I had a microplaner. (hint, hint Santa)

box grater, microplane, and zester for garnish strips or zest

line loaf pan with aluminum foil or parchment paper

Instructions:

Prepare loaf pan by lining with aluminum foil or parchment paper and greasing lightly. Whisk (or sift) dry ingredients into a small bowl and set aside. In a large mixing bowl beat butter 2-3 minutes. Gradually add sugar and beat for another 2-3 minutes until lightly coloured and fluffy.

On low speed add eggs one at a time, beating well after each addition and scraping down the sides as needed. On medium-high speed beat in the vanilla and lemon extracts, lemon juice and lemon zest. Batter will curdle – it’s supposed to.

creamed butter and sugar, curdled batter with buttermilk

On low speed add the flour mixture alternating with buttermilk (start and finish with flour). Don’t over mix. Scrape into the loaf pan and level batter. Bake 50-60 minutes until tester comes out clean. To prevent over-browning you can tent aluminum foil over the loaf pan for the last 20-30 minutes. Allow to cool 10 minutes before removing from the pan. Lift the loaf using the aluminum foil or parchment paper and place on a cooling rack. Let cool completely before serving.


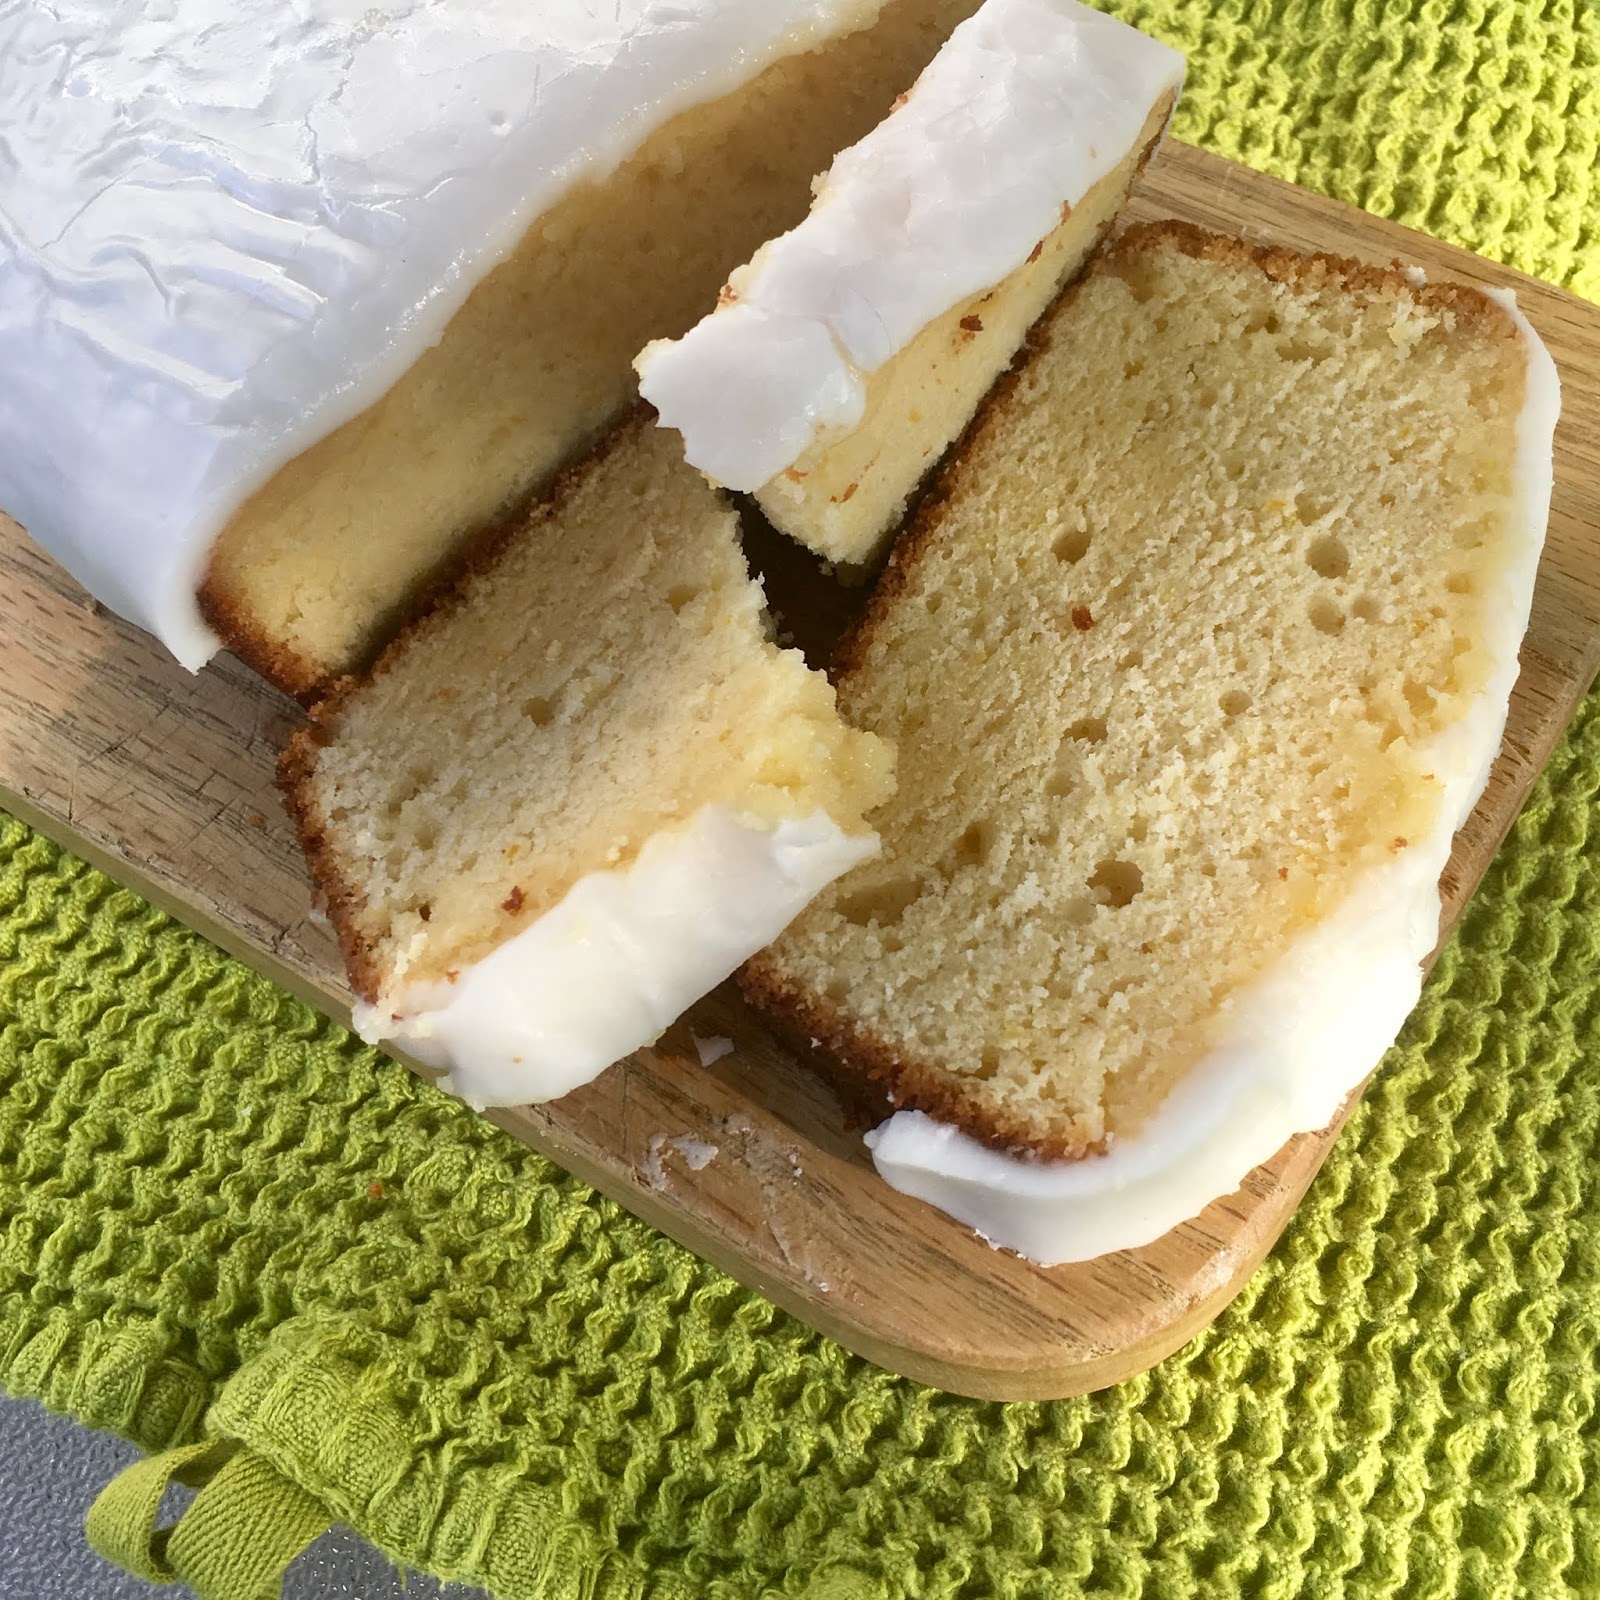
lemon loaf with glaze
For even more lemony flavour:

This loaf is moist and flavourful as it is but for more flavour you can do a lemon glaze or lemon icing. If you choose to not do a glaze you can boost the lemon extract in the loaf to 1-2 tablespoons. The first time I made this we left the loaf on the aluminum foil and poured the glaze over the loaf. Of course it ran down the sides of the loaf and the syrup pooled on the aluminum foil, resulting in all the flavour ending up at the bottom of the loaf. Then we discovered that you should poke holes in the loaf and let the loaf get infused with the syrup. We also tried a glaze with icing sugar. Now we do both a syrup to infuse the loaf and a thicker icing for the top of the loaf to make it feel more like a dessert cake rather than a tea loaf.


Lemon Glaze (Syrup)

Ingredients:
¼ cup lemon juice
¼ cup sugar

Instructions:
In a small bowl, combine lemon juice and sugar, stirring until sugar dissolves. (If it’s not dissolving you can put it in a small sauce pan and cook it on low until sugar dissolves.) Place loaf on cooling rack with a cookie sheet or aluminum foil underneath to catch the drips. While loaf is still warm pour glaze over top of loaf. To infuse the loaf with the syrup use a skewer or toothpick to poke holes in the top of the cake (and the sides for even more flavour). Brush or spoon glaze repeatedly over top (and sides) of loaf.

lemon loaf with a glaze made with icing sugar

Lemon Glaze (Icing)

Ingredients:
1 cup icing sugar (powdered sugar)
2 tbsp lemon juice
1-2 tbsp milk or cream

Instructions:
Mix lemon juice with icing sugar (I do this by hand in a small bowl). Be sure to remove any lumps. Add 1-2 tbsp of milk or cream. For thicker icing that doesn’t run add more icing sugar – lots of it. After loaf has completely cooled, pour or spread icing over the top of the lemon loaf. 

lemon loaf  infused with lemon glaze and topped with icing

Wednesday 17 April 2019

Sheila's Strawberry Shortcake or Taylor's Wednesday Waffles


Originally published in 2016


When I think of berries I always think of my mom. Mom was big on making jams and jellies, and from this photo below, it's quite clear she'd been doing it for many years. After she moved to Clayton Park, Mom used to enjoy telling the story about some neighbours who spotted her walking up and down the median of the divided highway behind their apartment building and wondered what she was doing. Mom had seen a recipe in the newspaper for "Rose Hip Jelly" - rose hips are the fruit that grow after roses bloom, just like apples grow after apple blossoms finish. As luck would have it, Mom's apartment building backed onto Dunbrack, a divided highway with rose bushes growing up and down the median. Hence "The Blind Lady" picking rose hips along the highway median!

Domestic Science (Home Economics) class, Central School, 1939
Mom (12 years old) on the far right
with her sewing projects behind her and canning on the table

I don't make cooked jams or jellies that require sterilizing bottles and melting wax, but I do try to make freezer jam every summer while strawberries are in season. We are just at the end of berry season in Canada, so I wanted to share with you one of our favourite desserts: strawberry shortcake. But first I'll tell you my favourite story about berry season.


Mom was a teacher at a community college and had the summers off. After a few weeks of summer vacation - after a few weeks of housework - Mom would throw up her hands and say, "That's enough, let's go camping." We would load up the car and go camping for the rest of the summer. Now, to fully appreciate this story, you need to know that my brother Thomas is not a morning person. Really NOT a morning person, and was often grumpy in the morning and didn't want anyone to talk to him (at least that is MY recollection). One summer, during berry season, Mom had gotten up early to go pick blackberries that she'd noticed growing on the side of the road in the campground (yes, she did seem to make a habit of this). She was back before Tom and I were even out of our sleeping bags, and she was preparing to make blackberry jam. Blackberries have a lot of seeds and you usually don't want them all in your jam so you strain them through cheesecloth. When Tom got up and came to the outdoor picnic table to eat his breakfast, Mom was already in the midst of making jam. She had this massive ball of blackberry pulp in a cheesecloth, squeezing it tight to get as much of the juices through the cheesecloth, trapping the seeds behind. She may have had too much, or been squeezing too hard, but whatever the reason, it exploded. Blackberry pulp EVERYWHERE. Including, of course, all over Tom. Mom and I must have laughed hysterically, but not Tom. He was NOT a happy camper!

Tom and me at the picnic table camping
He's looking pretty happy so it's probably NOT breakfast

This recipe can be used to make tea biscuits (aka baking powder biscuits) which Aunt Ruth often makes with half white flour and half whole wheat flour but she recommended an all-white biscuit for shortcake. She also adds a special touch by taking any leftovers juices and brushing the top of the biscuits, poking a fork into the top a few times and sprinkling a little sugar. According to Nana's cookbook, the amount of butter is increased from ¼ cup to ½ cup for shortcakes. We used Aunt Ruth's recipe but typically tea biscuits do not have sugar and I’m not sure it’s needed given that the biscuits get covered in berries! My kids would eat the biscuits as a desert in and of itself. 


The first time Mitchell tried to make these his hands were covered in the sticky dough. On advice from Aunt Ruth our second attempt was better because we floured the counter well and floured our hands well so we were able to knead it and prep it for cutting.

So here you go, the recipe.

Sheila’s Strawberry Shortcake

Preheat oven to 425°F
 
Ingredients:


2 cups All Purpose (white) flour
½ cup white sugar (optional)
1 tablespoon baking powder
½ tsp salt
½ cup butter or margarine
⅔ cup milk (alternatively add an egg to ½ cup milk and beat gently before adding)

Instructions for Shortcake:


Mix together dry ingredients; this can be done with your hands. Mix in butter/margarine until it is in small pieces. You can use your hands or a pastry cutter to “cut in” the butter. 


Pour liquid into centre of dry ingredients and mix quickly with a fork to make a soft dough. You may not need to add all the liquid. Turn out the dough onto a well-floured surface and knead 8-9 times (with well-floured hands). Roll the dough or pat it lightly into a flat sheet ½ - 1 inch thick. If you use a rolling pin make sure it is also well-floured. Cut out rounds or just cut into squares and place on a greased baking sheet (we usually use parchment paper instead). Bake 10-15 minutes until tops are golden brown.


Instructions for Fruit Topping:


1 quart of berries


Use a potato masher to crush half of the berries (sweeten if needed). Split the shortcake. Put the berries between the layers and on top of the shortcake. Top with whipped cream and garnish with whole or sliced berries.


We are big strawberry lovers in our family but we also love raspberries. Mike now has a big raspberry patch in our back yard including some black raspberries. In the summer, when berries are in season we've taken to adding Wednesday Waffles to our weekly dinner menu; it's one of Taylor's specialties.

Mike's raspberry patch

Raspberries, ripe for the picking

Raspberries and black raspberries from our backyard

Two pints harvested from our bushes for dinner
Wednesday Waffles by Taylor
Taylor's Waffles

A simple recipe that produces a light and crisp waffle. This is almost identical to the recipe for waffles in Nana's cookbook. Makes 6 - 8 waffles.

Preheat waffle iron.

Ingredients:

2 cups all purpose flour
3 tablespoons sugar
1 tablespoon baking powder
1 teaspoon salt
2 eggs
1/4 cup melted butter
1 1/4 - 1 1/2 cups milk, as needed
 

Instructions:

Place the flour, sugar, baking powder and salt in a small bowl. Stir with a wire whisk to evenly distribute the ingredients. Add the melted butter, eggs and about 1 1/4 cups of milk. Blend with a wire whisk until smooth and free from lumps. Batter should be thick but still pour slowly from a ladle or measuring cup. Add more milk as needed to obtain a thick but pourable consistency. If the batter becomes too thin, stir in a teaspoon or two of additional flour.
 

Follow cooking instructions for your waffle maker. Taylor's calls for a level 1/2 cup of batter poured onto the preheated waffle grid.

When waffles are removed they can be placed on a wire rack for about 30 seconds and served immediately. They can also be kept warm in a preheated 300°F oven for 5-10 minutes (or a warm-and-hold setting on your oven) but their consistency may change. Batter can be held overnight under refrigeration. If it thickens, add milk to the desired consistency.

How Mike likes his waffles

Friday 17 March 2017

Irish Soda Bread

Irish soda bread on a tea towel from Australia
Although our Nana (Rowena Leonard) was a MacLean of Scottish decent, and we most often associate Cape Breton, Nova Scotia with its Scottish heritage, the Leonard family did have ancestors from Ireland. And if that’s not a good enough reason to celebrate St. Patrick’s Day, there was of course Gordon Bingham who married my Aunt Edna (Leonard). Uncle Gordon was from Australia, but he had originally emigrated from Ireland. He spent his younger years in County Down in the northeast of Ireland.

County Down, Ireland

Gordon (born 1941) on the far left with his family.
Mom and Dad and six kids (plus two extra people in the photo).
Photo taken in Australia a few years after leaving Ireland.

Uncle Gordon Bingham on the far left
Left to right: Gordon, James,
John and Verna Holmes, Alyson Bingham,
Sheila and Thomas Holmes

Making Irish Soda Bread is a common tradition in many homes on St Patrick’s Day, including the Hayden-Holmes family. Starting in the 1800’s soda breads were the most commonly made bread in Ireland. With increased poverty and hunger after the potato famines, this was the easiest and least expensive bread to put on the table every day, and was often the only thing on the table. This bread was particularly ideal for rural Irish homes because it used only the most basic and readily-available ingredients: flour, salt, baking soda and sour milk.
Traditional way to make soda bread.

Because of the kind of wheat grown in Ireland’s climate (called “soft wheat”) these soda “quick breads” were used in place of recipes requiring yeast. Although we normally bake soda bread on a baking sheet or cookie sheet, in earlier times, before ovens were commonplace, most families had kitchens with open hearths. So this “cake-style” soda bread was routinely made in deep, lidded casseroles hanging over the open fire or sitting right in it.

This bread is best while it’s still warm but it can be hard to handle or slice when it’s hot. It goes well with a stew, chowder, soup, or any meal where you need some bread to soak up the gravy.

So here you go, the recipe.

Irish Soda Bread
Irish soda bread (and butter) with Campbell's tomato soup

Preheat oven to 350°F

Ingredients:

4 cup all purpose (white) flour
You can also try different combinations of flours
(see below)
2 tablespoon sugar
2 teaspoons baking powder
1½ teaspoon baking soda
1 teaspoon salt
2 tablespoons butter
1¾ cups buttermilk

Baking Tip:

Making a replacement for buttermilk:
You can make your own sour milk to use in place of buttermilk but you need the acidity of this liquid to mix with the baking soda for the leavening of the bread. You would simply mix 1¾ milk with 2 tbsp. vinegar in a glass measuring cup, and the milk will go sour. Instead of buying fresh buttermilk I use powdered buttermilk from the health food store which you simply mix with water. Buttermilk, by the way, sounds like it would be full of fat but it’s not.

Instructions:

Combine flour, sugar, baking powder, baking soda and salt. You can sift the ingredients together to be sure the soda is evenly distributed, but it is not necessary. With a pastry blender (or 2 knives) cut in butter until crumbly. Add buttermilk and stir to make a soft dough. Turn out onto a lightly floured counter and knead about 10 times until smooth. I use a large flattish stainless steel bowl and just knead it right in the bowl. Note: you can knead the bread with a food processor with the correct attachment but be careful not to mix it for too long or the bread won’t rise well and will be heavy.

Before and After, made entirely by hand.
Made entirely in the food processor, start to finish
Place the ball of dough on a greased baking sheet (we use parchment paper); flatten slightly into a circle about 2 ½ inches thick. On the top cut a large cross at least ¼ inch deep (a wet knife makes this easier). Irish folklore says the cross lets the evil spirits out or keeps the devil away, but really it just lets the bread rise and “flower” correctly. Bake in 350° F oven for 50 minutes to an 1 hour, or until toothpick inserted in centre comes out clean. Makes 1 loaf (about 16 slices).

This is a quick and easy recipe to do with kids and they like to get their hands a little messy and knead the bread. The first time we made this Mitchell and Taylor scored their initials into their loaves. This was whole wheat "brown" soda bread but they now they prefer the white bread. Even our picky eater Taylor likes this recipe. This year she suggested we try using this bread for grilled cheese sandwiches.

Traditional Brown Soda Bread

An alternative to the soda bread made with white flour is to replace the white flour with whole wheat flour, up to 3 of the 4 cups of flour, keeping one cup as all purpose white flour.

Five-Grain Soda Bread

An alternative to the white or whole wheat soda bread is a five-grain soda bread. I used to make this when I was eliminating wheat from my diet, using spelt flour to replace the whole wheat flour. For the recipe above you would replace the 3 cups whole wheat flour with a mix of grains: ¾ cup each of whole wheat, rye flour, graham flour and rolled oats. If you don’t have all of these flours replace with a combination of flours to 3¼ cups flour and ¾ oats. Because of the change in flours this recipe recommends 1 tbsp. baking powder, 1 tsp baking soda, ½ salt, and 3 tbsp. of soft margarine, vegetable oil or butter (at room temperature).

Happy St. Patrick's Day
Mitchell had soda bread with butter and raspberry jam for breakfast.

Sunday 28 February 2016

Taylor's Fudgy Brownies

This rose bud china plate was given to me by Nana.
There was a piece of masking tape on the back that said,
"For Sheila From Quispamsis"
(where Poppy's father had a summer home)
There were also two smaller plates; the three plates
hang on the wall in Taylor's bedroom.

Taylor made these brownies for her 14th birthday party in November, because she doesn’t like cake. Yes, she has unusual food preferences and a “discriminating palate” - which is just a nice way of saying she’s a picky eater. These are one of Taylor’s favourite things to make - and eat - and she often makes these for class parties or a potluck.


Taylor (second from the right) and her friends
in a private party room at a Karaoke bar

When Mom lived at the “Rosemount Centre for Seniors” she would walk down Rosemount Av with Taylor and Mitchell and I, and we would have lunch at Wellington Sandwiches. The kids called this sandwich shop “Phil’s” - short for Philomena, the name of the owner and cook. Everyone’s favourite thing about Phil’s was the brownies. When a friend in the neighbourhood made me brownies for a birthday gift we all loved them so much we asked for the recipe. Turns out the recipe is from the container of Fry’s Cocoa. They are fudgy on the inside with a nice “crust” on top. Phil’s have a thick layer of icing, but we’ve tried these with icing and decided they don’t need it. So here you go, the recipe.

Taylor’s Fudgy Brownies

Preheat oven to 350°F

Ingredients:

1 ⅓ cups All Purpose flour
1 teaspoon baking powder
½ teaspoon salt
1 cup butter
1 cup cocoa
2 cups sugar
4 eggs
1 ½ teaspoons vanilla
1 cup chopped nuts (optional)

Instructions:

Stir together flour, baking powder and salt in a small bowl. Melt butter in a large saucepan. Remove from heat. Stir in cocoa. Blend in dry ingredients and nuts (if using). Pour batter into greased 13 x 9 x 2-inch (3.5 L) rectangular baking pan. Bake 30-35 minutes until done (less time if it's in a dark pan).

Baking Tips:

Measuring margarine and butter:
My mom used to buy margarine in ½ cup squares, to make measuring easier. If you don’t want to use margarine you can buy sticks of butter; one stick is ½ cup. The wrapper also has measurements for smaller amounts like tablespoons. Save the foil or wax paper wrapper and use it to grease the pan when you’re baking.

Melting butter:
Rather than melting butter in a saucepan (as the recipe calls for) and then adding the other ingredients to the saucepan, you can melt butter in the microwave and then use a stand mixer to mix the batter. However, you need to be careful if you melt butter in the microwave. Cut the butter into small pieces and cover the glass bowl with paper towel; this can help prevent splattering or getting scalded. Melt on a low temperature or on "defrost" and keep an eye on it because you don't want it to boil or burn. Check it every 10-15 seconds until it is almost melted, with just a few solid pieces remaining (items in the microwave continue to cook after they are removed). Remove from the microwave and stir until it's completely melted.

In the "olden days" (as my kids say) they would take a piece of straw from a broom to test a cake (or brownies) but you can use a wooden toothpick. Test to see if they are done by poking the centre of the brownies and if the toothpick comes out clean they are done. If dough sticks to the toothpick they are not finished yet. When they are done the edges will look dry and start to pull away from the side of the pan. If you wait too long the edges will start to burn.
 
We have a non-stick Pyrex baking pan with a plastic lid for carrying
 - it has seen a lot of use!

Monday 22 February 2016

Aunt Verna's Peanut Butter Cookies

This week we had a massive winter storm in Ottawa, setting a new city record for the most snow in one day; by the end of the day we had accumulated 51.5 cm (or 20 inches) of snow! It reminded me of a snowstorm we had in Nova Scotia when I was a kid. I remember the snow being almost as tall as me! Of course I wasn't very tall yet, but the significant thing about it was the sense of awe and wonder.

My father John Holmes with my younger brother Thomas and I

Because they lived further away, my cousins in Ontario and California usually visited Cape Breton in the summer, where they would be staying at the bungalow (what they call a cottage in Cape Breton).

Back row: Uncle Walter, Nana, Aunt Ruth, Pop
Front row: Natalie, Jan and Tara Leonard
 
We too spent time at the bungalow every summer, but my family also went to Cape Breton over the Christmas holidays. When I was little we spent Christmas Day in Sydney, but we only continued to do that for a few years after Thomas was born. Then we spent Christmas at home and travelled to Sydney for the rest of the Christmas holidays. I remember flying as a child but at some point we started taking the train instead - which we really enjoyed - and we usually travelled on Boxing Day.

Thomas and I on a winter train ride to Sydney
After our big snowfall in Ottawa I tried to shoo my kids out the door to go tobogganing, and it reminded me of a time one winter when we were staying at Nana and Pop’s house on St Peter’s Rd.

I’m not sure if Nana was shooing me out the door to play in the snow, or if I wanted to go myself, or if my brother came with me or not. What I will never forget was Nana giving me a cardboard box and telling me to go sliding on the hill in the schoolyard of Colby School behind their house. I have a feeling cardboard boxes were sturdier in those days, and maybe they had a waxed finish, but still, a cardboard box?! Needless-to-say, it didn’t really work very well. But it was memorable!
 
Many years later I saw this Peanuts strip and remembered my own adventure trying to slide down a hill in a cardboard box.


In her “Leonard Family Tales” Mom talks about coming in from outside and having a winter treat, "Coming home from skating, a treat would be cocoa [hot chocolate] with bread and molasses with butter, but the butter was put on after the molasses." Since I haven’t tackled bread-making yet, I thought I’d try these cookies on our big “snow day.”

I don’t know if Nana made peanut butter cookies, but MY mother sure did! This handwritten recipe, in the back of Nana’s cookbook, was not in Nana's handwriting like the other recipes. I suspect this was written by a child, but I’m not sure if it was my mom or Aunt Edna. I asked Aunt Edna if she baked much with her mom and her response was, “I didn’t bake much with Mom at all that I remember – she always asked me to dust??” This leads me to suspect that Nana was trying to keep Edna busy and out of the kitchen. More than likely the recipe was written by Mom. I love the child's printing and the little flourish on the letter "g."

So here you go, the recipe.

Aunt Verna’s Peanut Butter Cookies

Preheat oven to 350°F

Ingredients:

½ cup butter
½ cup peanut butter
½ cup sugar
½ cup brown sugar
1 egg
1 ¾ cup All Purpose flour
¼ tsp salt
½ tsp baking soda

Instructions:

Cream together butter and sugar. Add peanut butter and brown sugar and cream again. Add the egg and mix. Stir together dry ingredients and add. Use a teaspoon to scoop out dough and form balls the size of walnuts. Place the balls an inch apart on ungreased cookie sheets. Flatten the balls with a fork (dipped in water so it won't stick). Bake 8 -10 minutes and remove. The centre of the cookies may not look cooked but remove them anyway; they will puff up and then fall after they are removed. Makes 2 ½ - 3 dozen cookies.

Note: I cooked my first batch until the cookies puffed up and the edges looked cooked, but the edges were not browned. The second batch I cooked until the edges started to brown. I found the browned ones were too crispy and crumbly, while the others were nice and chewy. Mike suggested, having watched his mom make these, that they need to be smaller to make it easier to flatten with the fork. I have another recipe for peanut butter cookies that I used to make as a kid so I’ll have to try those at another time.

Baking Tip:

Measuring solid fats

Some things like shortening, butter or margarine, or in this case peanut butter, are hard to measure if they don’t come in ½ cup blocks or sticks. If you try to measure them in a measuring cup you have to make sure it is all pushed down and there are no air pockets. Then you have to use a spatula to scoop all that sticky peanut butter out of the measuring cup.

As an alternative, you can use a glass measuring cup. To measure out ½ cup of peanut butter for this recipe I filled a clear glass 2 cup measuring cup with 1 ½ cups water. Then, I scooped the peanut butter out of the jar and plopped it into the cup, and the water rose. Once the liquid hit 2 cups I knew that I had half a cup of peanut butter. It does not look appealing but it does make it easier.

Cookie dough is pretty thick and can be hard to mix
with a handheld mixer, but a stand mixer does the trick.


Sunday 14 February 2016

Great Aunt Edna's Oatmeal Cookies

My mother Verna made these oatmeal cookies quite often in our house, as did her mother before her. In the "Leonard Family Tales" Mom said Nana spent a lot of time in the kitchen. She said, "My mother made innumerable sweets. My father had a sweet tooth and he ate dessert every mealtime, and candy during the evening. He would eat chocolates - in fact, half a box of chocolates - every evening, and then he would have an evening snack of milk and some kind of sweets."


Nana and Poppy left the family home on St Peter's Rd and moved to a nursing home called "The Cove" when my cousin James was an infant. Pop would have been having a "day out" in this photo with James at the bungalow (what they call a cottage in Cape Breton). Pop died in 1981 when James would have been three so this might have been his last summer visiting with my cousins from California. I can imagine Pop eating these oatmeal cookies with a cold glass of milk in the evening.

Oatmeal Cookies

Preheat oven to 400°F
(hot oven)

Ingredients:

1 cup butter and shortening
1 cup brown sugar
2 scant cups oatmeal
2 scant cups All Purpose flour
¼ tsp cream of tartar
1 tsp baking soda
4 tbsp water
¼ tsp salt
1 tsp vanilla

Instructions:

Melt butter and shortening. Cream together butter and sugar. Dissolve baking soda in water and add vanilla, then add mixture to the dough. Stir together dry ingredients and add. Mix well. (The dough can be refrigerated at this point to make handling easier, or saved to bake later.) Use a teaspoon to scoop out dough and form balls the size of walnuts. Place two inches apart on ungreased cookie sheets (parchment paper makes clean-up easy and is compostable). Spread them very thin with a fork dipped in cold water. Bake 8-10 minutes (depending on the thickness) until the edges brown, and remove. Make sure the cookie doesn’t look raw in the centre. Cool for a few minutes on the cookie sheet and then transfer to cooling racks to finish cooling.
 
Note: I refrigerated the dough before baking these cookies so they didn't flatten as much as they would have if they had been cooked right away.

Nana’s blue recipe card credits Edna Farquhar for this recipe. This Edna was our Poppy’s (Charles Edwin Leonard) sister, so she was "Aunt Edna" to Verna, Harry, Walter and Edna Leonard.

Baking Tips:

Measuring brown sugar
When you measure brown sugar the recipes usually call for “packed” brown sugar, even if it's not indicated in the instructions. To “pack” brown sugar, use a spoon to scoop a small amount of brown sugar into the measuring cup and press down with the spoon. Add more and press again. Continue until the measuring cup is full.

Various measurements of a cup
A "scant cup" is a cup minus one or two teaspoons. A "heaping cup" is a cup with an additional one or two teaspoons. For liquids it's referred to as a "generous cup." Liquids are best measured in a clear measuring cup with a spout. Dry ingredients are measure in a measuring cup without a spout.

Friday 12 February 2016

Family recipes - and a blog - made with love


The food that we make and share as a family is part of our heritage. As a wedding gift to my cousins in California, I wanted to share with them the Leonard heritage in the form of recipes - from Cape Breton, from Nova Scotia, and from Canada. This gift comes from myself and my Holmes-Hayden family, but also from my mother, known to my cousins as Aunt Verna (my mother's maiden name was Leonard).
 
A family dinner at 32 St Peter's Road, Sydney, Nova Scotia, 1966
Clockwise from the left: John Leonard, Poppy, Aunt Mary,
Verna (my mom), Aunt Edna, and in front Nana
 
My grandparents, Charlie and Rowena Leonard, had nine grandchildren and we all called them Nana and Poppy (or Pop). The youngest of those grandchildren were my Aunt Edna's children Alyson and James (Edna was fourteen years younger than my mom). Alyson and James Bingham were also the last of my cousins to get married; James and his wife Daniella were married not long after my mother died, and Alyson married James Brandle this past summer.
 
James and Alyson Bingham with Pop at St Peter's Road
 
Mom tried to stay very involved in the lives of her seven nieces and nephews. Even though her younger sister Edna lived in California, Mom tried to visit and be there for special occasions like graduations. She no doubt would have wanted to be there for the weddings.

When James and Daniella were married I had this idea to organize and share with them recipes from my mother and grandmother. Shortly after their wedding I became very ill and unfortunately the project got dropped. This past summer, when James' older sister Alyson got married, I decided to unearth this project and give it a second try.
 
When I first asked relatives to send me some family recipes Aunt Ruth sent some index cards with recipes, and in brackets Aunt Ruth wrote, "A Leonard favourite." So I have to credit her as the inspiration for the name of this blog. Along with Ruth's recipes there were a few blue recipe cards that were originally Nana's, in her own handwriting. I was very touched to receive those but felt that I should somehow share those with all of my cousins.
 
 
When I recently decided to revisit this idea, Ruth also sent me Nana's original cookbook, which had a lot of writing on the inside covers. Mom once told me that Nana didn't know how to cook a thing when she first got married, so I suspect that explains why this cookbook is so well-worn. Many of the handwritten recipes just had ingredients, and an oven setting (low, moderate or hot) so Aunt Ruth has been answering lots of my questions as I have been working on deciphering the recipes and writing instructions.
 
 
In 1999 Mom gave all of the Leonards copies of her research on the family tree, which she called "Leonard Family and Descendants 1700-2000," as well as copies of the "Leonard Family Tales" - her stories about the lives of she and her two younger brothers, Harry and Walter, and her sister Edna. Before she died she also told me that she wanted each of her nieces and nephews to have one of her paintings. So in keeping with Mom's example, it seemed appropriate that a wedding gift for our youngest cousins would be family recipes - and some stories and photos thrown into the mix. Rather than writing the recipes on index cards, I thought a blog would be the best way to share them. It's also a little less overwhelming if I work on it one recipe at a time. My goal is to test these recipes, write instructions, take photos, and post it on the blog. Stay tuned for bread, brownies, birthday cakes, and more.
 
Me making what looks like dinner rolls
(probably two years old, based on the haircut)
Mom baked with me as a child, and my twins Mitchell and Taylor started baking when they were quite young. They are fourteen now, and pretty independent in the kitchen, so I will also share some of their favourite things to bake. For my cousins - not just the ones in California - I hope you will be inspired to try these recipes for yourself, and share these experiences, with your own children, your students, or your nieces and nephews.
 

Mitchell and Taylor making gingerbread cookies for Christmas
(26-months-old)